
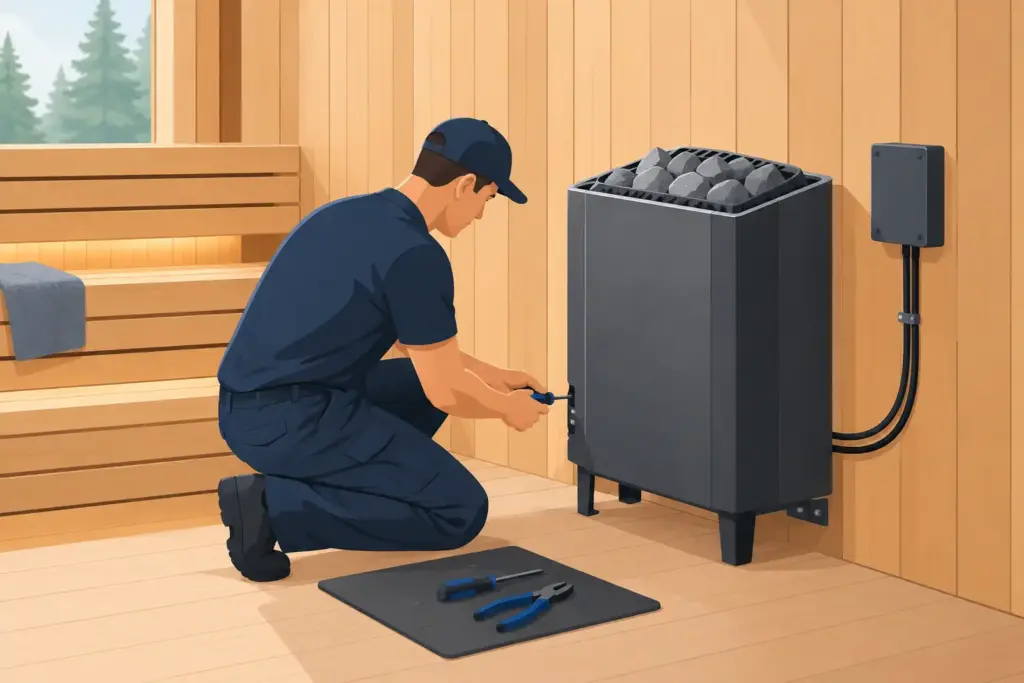
A sauna heater is not a plug-and-play appliance. It is the component that determines how quickly your room heats, how comfortable the löyly feels, and, most importantly, whether your sauna operates safely for years. Knowing how to install a sauna heater starts with respecting the heater manufacturer’s specifications, the sauna room’s construction, and the electrical or venting requirements that apply to your home.
For most residential electric sauna heaters, the final electrical connection should be handled by a licensed electrician. That is not a shortcut or an upsell. A properly sized dedicated circuit, correctly rated wire, and code-compliant disconnect protect both your investment and your home. The installation itself still involves several decisions you can plan confidently before the electrician arrives.
Start with the right heater and location
Before mounting anything, confirm that the heater is correctly sized for the sauna. Heater output is usually expressed in kilowatts, and sizing is based on the room’s interior cubic footage. Measure length, width, and ceiling height, then multiply them to find the room volume.
That baseline is only the beginning. Glass doors, windows, stone, tile, concrete, and other uninsulated surfaces increase the effective heating load. A sauna with a large glass front may need a more powerful heater than a same-size room built entirely with insulated wood walls. Buying an undersized heater can mean slow heat-up times and a heater that works harder than it should. Oversizing has trade-offs too: it may require a larger electrical circuit and can make a compact room feel aggressively hot.
Select the mounting wall before the sauna is finished whenever possible. The heater must sit where its required safety clearances can be maintained on every side, including the distance to benches, guard rails, walls, and the ceiling. Those distances vary by model, so the heater manual is the authority. Never estimate based on another heater or a photo online.
For a wall-mounted electric heater, locate solid framing or install proper blocking behind the interior sauna paneling. A heater filled with stones is heavy. Fastening mounting brackets only into thin tongue-and-groove paneling is not acceptable. Floor-standing heaters also need a stable, level, noncombustible surface and may require anchoring as specified by the manufacturer.
Plan the electrical work before installing the heater
Electric sauna heaters require a dedicated circuit. They are typically hardwired rather than connected to a standard household outlet, and their voltage, amperage, breaker size, wire gauge, and disconnect requirements depend on the exact model.
Check the heater data plate and installation manual for the required supply voltage. Many North American residential models use 240 volts, while some models require a neutral connection for controls or lighting functions. Do not assume the wiring configuration from the heater’s physical size or kilowatt rating alone.
A licensed electrician should verify the following before connecting the heater:
- The dedicated breaker is correctly sized for the heater’s listed load.
- Wire type and gauge meet the heater instructions and local electrical code.
- Wiring routed inside the sauna is rated for the elevated temperatures in that location.
- The disconnecting means, control location, and any required ground-fault protection meet local requirements.
- The heater is properly grounded and all connections are secure.
Do not place standard plastic junction boxes, ordinary thermostat wire, or unapproved cable where sauna heat can damage them. Also, do not run heater wiring through a wall cavity without considering insulation, vapor barrier details, and the manufacturer’s approved routing method.
If your heater uses a separate wall control, decide where it will live before wiring begins. Some controls are designed for installation outside the sauna room, while others have specific placement rules. Put the control where it is convenient to reach without exposing it to direct sauna heat, water, or accidental contact from bathers.
Mount the heater with the required clearances
Turn off power at the breaker before any installation or inspection work. With the mounting location marked, install the supplied wall bracket or floor supports exactly as shown in the heater instructions. Use the manufacturer-provided hardware when possible, and use only fasteners appropriate for the backing material.
Once the heater is mounted, measure each clearance again. Check side-to-wall distance, heater-to-bench distance, floor clearance, ceiling clearance, and any distance to a protective guard. This is where a careful installation separates a premium sauna from a risky one.
A wood safety rail around the heater is common, especially in family saunas or rooms with narrow walkways. It keeps users from accidentally touching hot metal, but it is not a substitute for the heater’s required clearances. Build the rail only after the heater is installed and measured, and keep it outside the manufacturer’s specified safety zone.
Do not install a heater directly beneath a bench unless the model is specifically designed for that arrangement. Avoid placing towel hooks, shelving, or combustible decorations above or beside the heater. The hottest air rises directly from the stone compartment, and even a well-built sauna needs open space for safe airflow.
Connect controls, sensors, and electrical service correctly
Many premium heaters use an external controller and a temperature sensor mounted high on the sauna wall. The sensor location matters. If it is placed too close to the heater, too low on the wall, or behind a bench, it can read the wrong temperature and cause poor performance or safety shutoffs.
Follow the sensor placement diagram supplied with your heater. It commonly specifies a location near the ceiling, a set distance from the heater, and a required orientation. Do not relocate it simply because another spot looks cleaner.
Your electrician should make all final line-voltage connections according to the wiring diagram for that exact heater and control package. Before energizing the system, verify that the heater, controller, sensor, and optional lights or ventilation components are all connected to the correct terminals. A control may look compatible with a heater from the same brand yet use a different wiring arrangement or capacity range.
This is also the time to confirm whether your heater supports remote start. Some jurisdictions and heater systems require door monitoring, timed controls, or other safety measures for remote operation. Remote capability is convenient, but it should never override fire safety or local code.
Load sauna stones carefully
Sauna stones are not decorative filler. They store heat, protect the heating elements, and create the soft, humid burst of steam when water is ladled over them. Use only stones approved for sauna heater use. Landscaping rock, river rock, and unknown stones can crack, pop, or shed debris when heated.
Rinse dust from the stones and allow them to dry before loading. Place larger stones loosely around the lower portions of the heating elements, then fill the upper area without packing the stones tightly. Air must circulate through the stone compartment. If stones are jammed together, the heater can overheat, heat slowly, or trigger a high-limit safety switch.
Keep stones from forcing heating elements out of position. On heaters with exposed elements, the stones should rest naturally between and around them, not bend them. After the first few heating cycles, inspect the stone bed again. Stones can settle, and a quick adjustment may restore proper airflow.
Test the installation before regular use
With the room clear of packaging, tools, and combustible materials, energize the heater and run its first test according to the manual. New heaters often produce a temporary manufacturing odor as residues burn off. Ventilate the sauna during this initial run and do not treat it as a normal bathing session.
Watch for several signs of a correct installation: the controller powers on normally, the heater warms evenly, no breaker trips, no unusual electrical smell persists, and the sauna reaches its intended temperature without a safety cutoff. Once the stones are fully hot, add a small amount of water only if your heater is designed for water on the stones.
If the heater shuts down repeatedly, heats unevenly, shows an error code, or trips the breaker, stop using it. Do not keep resetting a safety device to force operation. The issue may be stone loading, sensor placement, wiring, heater sizing, or a defective component, and it should be diagnosed before the next session.
Wood-burning sauna heaters need a different plan
A wood-burning sauna stove is installed very differently from an electric heater. It requires a properly designed chimney system, safe wall and ceiling penetrations, hearth protection, combustion clearances, and adequate combustion air. Local building and fire requirements can be substantial, particularly for indoor installations.
Use the stove manufacturer’s clearance charts and chimney components as a matched system. Do not improvise with generic stovepipe parts or reduce clearances without an approved heat shield design. A qualified chimney or hearth professional is often the right partner for this work, and permits may be required.
The quality of the heater matters, but installation is what allows that quality to perform. Choose a hand-picked heater that fits your room, follow its instructions without substitutions, and bring in licensed professionals for electrical or chimney work. That care gives you the part that matters most: a sauna that feels exceptional every time you step inside.
Leave a Reply