
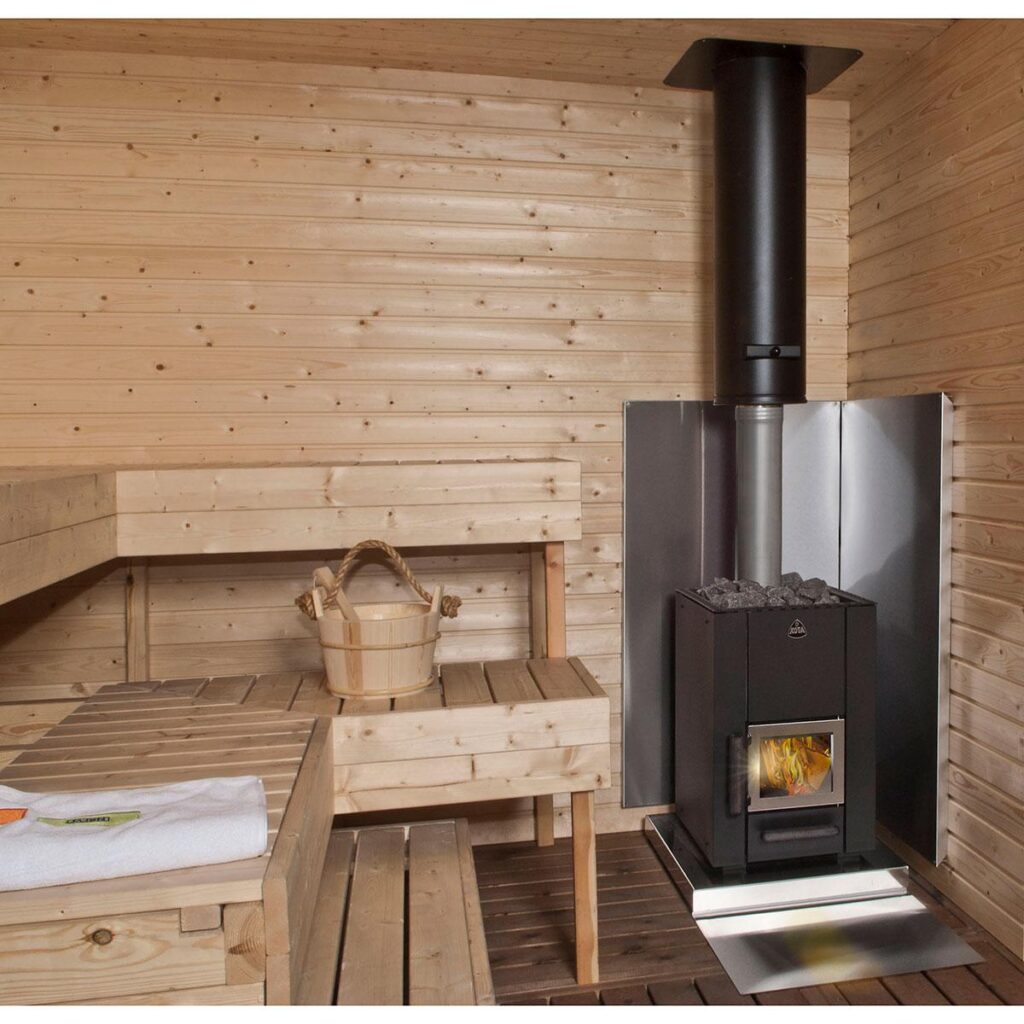
The allure of a warm, steamy sauna is undeniable, offering relaxation, health benefits, and a tranquil escape. However, behind every perfect sauna experience lies a crucial, often overlooked component: the sauna chimney. Far more than just a pipe, the chimney system is the heart of your sauna’s ventilation and exhaust, directly impacting safety, efficiency, and the overall quality of your heat. Understanding its intricacies is paramount for anyone building, maintaining, or even just enjoying a sauna.
A poorly designed or improperly installed sauna chimney can lead to a host of problems, ranging from inefficient heating and smoke leakage to, more seriously, fire hazards and carbon monoxide poisoning. This comprehensive guide will navigate you through the essential considerations for your sauna chimney, ensuring you have the knowledge to create a safe, effective, and long-lasting sauna environment.
Understanding the Core Function of a Sauna Chimney
At its heart, the sauna chimney serves two primary functions: to safely vent combustion byproducts (smoke, carbon monoxide, unburnt particles) from the sauna stove to the outside atmosphere, and to create a natural draft that supplies fresh air for combustion. This draft is crucial for the stove to burn efficiently and cleanly. Without a proper draft, smoke can back up into the sauna, posing significant health risks and diminishing the experience.
The Science of Draft
Draft is essentially the movement of air and gases upwards through the chimney due to differences in temperature and pressure. Hot gases inside the chimney are less dense than the cooler air outside, causing them to rise. This creates a negative pressure at the base of the chimney, pulling fresh air into the stove’s firebox. Several factors influence draft, including chimney height, diameter, insulation, and the temperature differential between the flue gases and the ambient air.
Key Components of a Sauna Chimney System Sauna Chimney
A complete sauna chimney system comprises several interconnected parts, each playing a vital role. Understanding these components is the first step towards ensuring a safe and efficient installation.
- Stove Adapter/Flue Collar: This is the initial connection point between the sauna stove and the chimney pipe. It must be securely fitted to prevent smoke leaks.
- Single-Wall Stove Pipe: Typically used for the initial run directly from the stove, this pipe is designed to radiate heat into the sauna space. It’s important to note that single-wall pipe gets extremely hot and requires significant clearance from combustibles.
- Insulated Chimney Pipe (Double-Wall or Triple-Wall): As the pipe passes through combustible materials (like walls, ceilings, or roofs), it must transition to an insulated system. These pipes feature an inner and outer casing with insulation material (often ceramic fiber) in between, drastically reducing the external surface temperature and preventing heat transfer to surrounding structures.
- Wall Thimble/Ceiling Support Box: These components provide a safe passage for the insulated chimney pipe through walls or ceilings. They create the necessary air gap (clearance to combustibles) and support the weight of the chimney.
- Roof Flashing: A weather-tight seal where the chimney penetrates the roof. It prevents water ingress and is designed to accommodate the roof pitch.
- Storm Collar: Sits above the roof flashing, preventing water from running down the exterior of the chimney pipe and under the flashing.
- Chimney Cap: Installed at the very top of the chimney, the cap serves multiple purposes: it prevents rain, snow, and debris (like leaves or bird nests) from entering the flue, and often includes a spark arrestor to catch embers.
- Support Brackets/Straps: Used to secure the chimney to the structure, especially for taller exterior runs, ensuring stability against wind and seismic activity.
Material Selection for Your Sauna Chimney
The choice of materials for your sauna chimney is critical, impacting its longevity, safety, and performance. Stainless steel is almost universally recommended for sauna applications due to its excellent resistance to corrosion and high temperatures.
Stainless Steel Grades
- Type 304 Stainless Steel: A common and generally good option for the outer casing of insulated chimney pipes. It offers good corrosion resistance.
- Type 316L Stainless Steel: Superior to 304, particularly for the inner liner of the chimney pipe. It provides enhanced resistance to creosote and corrosive acids that can form during combustion, especially when burning wood. The ‘L’ denotes low carbon content, which further improves weldability and corrosion resistance.
Always opt for chimney components that are UL (Underwriters Laboratories) or equivalent certified (e.g., ULC in Canada, CE in Europe) for solid fuel appliances. This ensures they have undergone rigorous testing for safety and performance. Sauna Chimney
Critical Safety Clearances and Installation Practices
This is perhaps the most vital section of any sauna chimney discussion. Violating clearance requirements is the leading cause of chimney-related fires. Always refer to the manufacturer’s instructions for specific clearance distances, as these can vary slightly between products. Sauna Chimney
Clearance to Combustibles
- Single-Wall Pipe: Typically requires 18-24 inches (45-60 cm) of clearance from combustible materials (wood, drywall, insulation, fabric, etc.). Heat shields can sometimes reduce this, but careful calculation and adherence to listed reductions are essential.
- Insulated Chimney Pipe: The beauty of insulated pipe is its significantly reduced clearance requirement, often 2 inches (5 cm) or less. This allows it to safely pass through walls and ceilings. However, this clearance must be maintained rigorously; no combustible material should ever touch the insulated pipe.
Proper Installation Steps (General Overview):
- Stove Connection: Securely connect the single-wall stove pipe to the stove’s flue collar. Ensure proper sealing with high-temperature sealant or stove cement.
- Vertical Rise: Aim for as much vertical rise as possible with the single-wall pipe before transitioning to insulated pipe. This helps establish a good initial draft.
- Transition to Insulated Pipe: Use an adapter to transition from single-wall to insulated pipe. This transition must occur before penetrating any combustible surface.
- Wall/Ceiling Penetration: Install appropriate wall thimbles or ceiling support boxes. These create the required clearance and support the chimney.
- Stacking Sections: Chimney sections typically twist-lock or clamp together. Ensure each connection is secure and properly oriented (male end down, female end up, to prevent creosote leakage).
- Roof Penetration: Install the roof flashing according to your roof pitch, ensuring a watertight seal. Place the storm collar above the flashing and seal it with high-temperature silicone.
- Chimney Height: Adhere to the ‘3-2-10 Rule’ (or local building codes): The chimney must extend at least 3 feet (0.9 meters) above the highest point where it passes through the roof, and at least 2 feet (0.6 meters) higher than any part of the building within 10 feet (3 meters) horizontally. This rule helps prevent downdrafts and ensures adequate dispersion of smoke.
- Support: Provide adequate support for the chimney, especially for sections extending above the roofline or for long horizontal runs (though horizontal runs should be minimized).
- Chimney Cap: Install the appropriate chimney cap with a spark arrestor.
Ventilation and Airflow Considerations
Beyond the chimney itself, the overall ventilation of your sauna plays a crucial role in its safety and efficiency. A sauna stove needs a constant supply of fresh air for complete combustion. This air typically enters through a fresh air inlet near the stove.
Inlet and Outlet Vents
- Fresh Air Inlet: Located low on the wall, near the stove. This supplies oxygen for combustion and for bathers.
- Exhaust Vent: Located high on an opposite wall or near the ceiling, facilitating the removal of stale air and promoting air circulation.
Proper ventilation not only ensures safe combustion but also helps manage humidity, reduces the risk of mold, and enhances the overall comfort of the sauna experience. Never seal your sauna completely; continuous, controlled airflow is essential.
Common Sauna Chimney Problems and Troubleshooting
Even with careful installation, issues can arise. Knowing how to identify and address them is key to maintaining a safe and enjoyable sauna.
Poor Draft / Smoke Rollback
- Causes: Insufficient chimney height, too many horizontal offsets, cold chimney (before it heats up), blockages (soot, debris, animal nests), negative pressure in the sauna (e.g., powerful exhaust fan elsewhere).
- Solutions: Increase chimney height, ensure a straight vertical run, pre-heat the flue with a small amount of kindling, clean the chimney, ensure adequate fresh air supply.
Creosote Buildup
- Causes: Burning unseasoned wood, insufficient air supply to the fire, low flue gas temperatures (e.g., oversized stove, cold chimney), slow, smoldering fires.
- Solutions: Burn dry, seasoned hardwood; ensure adequate combustion air; maintain hot, lively fires; regular chimney cleaning. Creosote is highly flammable and a major fire hazard.
Water Leaks
- Causes: Improperly installed or damaged roof flashing, missing or improperly sealed storm collar, damaged chimney cap.
- Solutions: Inspect and repair/replace flashing, ensure storm collar is sealed, check chimney cap for damage.
Excessive Heat Transfer to Combustibles
- Causes: Insufficient clearances, damaged insulation in insulated pipe, combustible materials too close to single-wall pipe.
- Solutions: Re-evaluate and adjust clearances; replace damaged pipe sections; install appropriate heat shields (if code-approved and properly sized).
Maintenance and Cleaning of Your Sauna Chimney
Regular maintenance is non-negotiable for a safe sauna chimney. Creosote buildup is the primary concern, requiring periodic removal.
Cleaning Frequency
The frequency of cleaning depends on usage and burning habits. For a frequently used wood-fired sauna, annual or even bi-annual cleaning is recommended. If you notice a creosote buildup of 1/4 inch (6 mm) or more, it’s time to clean.
Cleaning Process
- Preparation: Protect the sauna interior by covering the stove and surrounding areas to catch falling soot. Close any damper in the stove.
- Access: Chimneys are typically cleaned from the top down, using a chimney brush attached to flexible rods. Access can also be from below via a cleanout tee, if installed.
- Brushing: Push the brush up and down the chimney, ensuring it scrapes against the inner walls to dislodge creosote.
- Removal: Once brushing is complete, carefully remove the soot and creosote from the stove and any cleanout openings.
- Inspection: After cleaning, inspect the chimney for any signs of damage, cracks, or corrosion.
While DIY cleaning is possible, many prefer to hire a certified chimney sweep, especially for complex or tall chimney systems. They have specialized tools and expertise to ensure a thorough and safe cleaning.
Advanced Considerations and Best Practices
Taking your sauna chimney knowledge to the next level involves understanding some finer points that can further enhance safety and performance.
Chimney Height and Diameter Optimization
The optimal chimney height and diameter are crucial for efficient draft. A chimney that is too short or too wide may result in poor draft, while one that is too narrow can restrict airflow. Manufacturers typically specify recommended chimney diameters for their stoves. For height, the ‘3-2-10 Rule’ is a minimum, and sometimes a taller chimney is beneficial, especially in areas with complex wind patterns or nearby tall structures.
Minimizing Offsets and Horizontal Runs
Every bend (offset) and horizontal section in a chimney pipe reduces draft and increases the likelihood of creosote buildup. Design your chimney system to be as straight and vertical as possible. If offsets are necessary, keep them to a minimum and ensure they are well-supported.
Insulation for Single-Wall Pipe?
While the primary purpose of single-wall pipe is to radiate heat, in some specific installations, insulating the single-wall section (e.g., within a chase) might be considered to maintain flue gas temperatures and improve draft, but this must be done with extreme caution and only with approved methods and materials that maintain required clearances and prevent overheating of surrounding structures. Generally, it’s safer and simpler to transition to insulated pipe when passing through any enclosed or combustible space.
Consider a Chimney Liner (for Masonry Chimneys)
If you are connecting a sauna stove to an existing masonry chimney, it is almost always recommended to install a stainless steel chimney liner. Masonry chimneys can have cracks, deteriorating mortar, or be oversized for a modern sauna stove, leading to poor draft and potential safety hazards. A properly sized and installed stainless steel liner ensures a smooth, consistent flue, improves draft, and contains combustion byproducts safely.
Carbon Monoxide Detectors
Regardless of how perfectly installed your sauna chimney is, a carbon monoxide (CO) detector is an absolute must-have in any sauna with a combustion stove. CO is an odorless, colorless, and deadly gas. A detector provides an invaluable layer of safety, alerting you to any potential issues before they become critical.
Local Building Codes and Regulations
Always, always, always consult your local building codes and fire regulations before installing or modifying a sauna chimney. These codes are minimum safety standards and may have specific requirements that supersede general guidelines. Obtaining necessary permits and having your installation inspected by a qualified professional is the best way to ensure compliance and peace of mind.
The Importance of Professional Installation and Inspection
While this guide provides comprehensive information, the installation of a sauna chimney is not a DIY project for the inexperienced. Mistakes can have severe consequences. Hiring a certified professional for installation or at least for a thorough inspection after a DIY project is highly recommended. A professional can ensure:
- Correct sizing and component selection for your specific stove and sauna.
- Adherence to all local building codes and manufacturer specifications.
- Proper clearances to combustibles are maintained.
- A safe and efficient draft is established.
- All connections are secure and leak-proof.
The sauna chimney, though seemingly simple, is a sophisticated system that demands respect and careful attention to detail. By understanding its function, components, installation requirements, and maintenance needs, you can ensure your sauna remains a safe, efficient, and deeply rewarding sanctuary for years to come. Prioritizing safety and proper construction will allow you to fully enjoy the warmth and tranquility your sauna offers.
Leave a Reply