
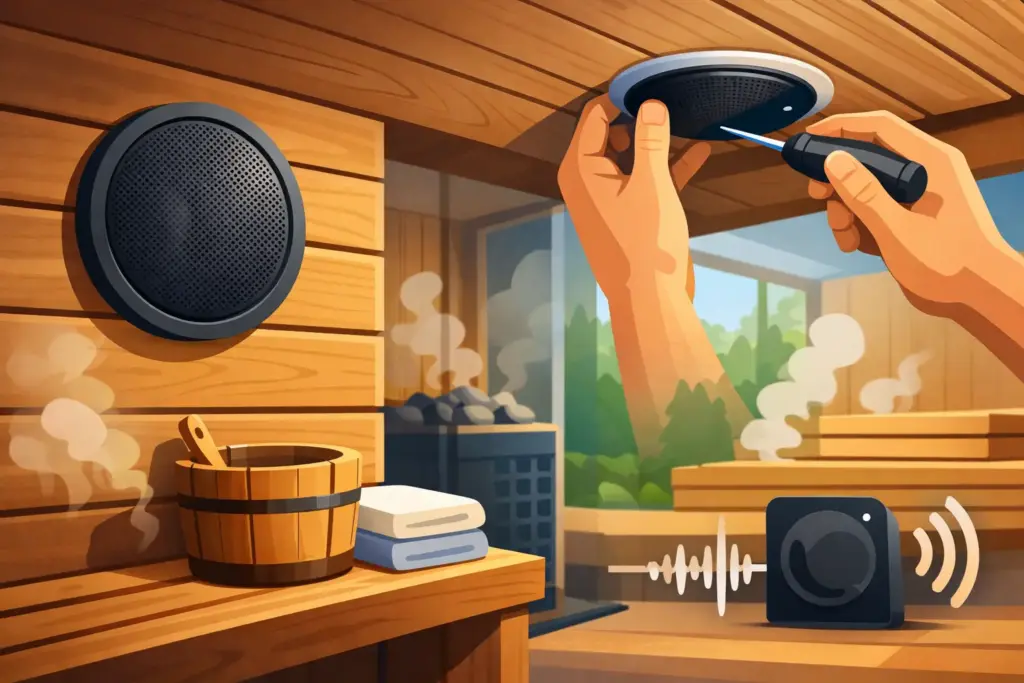
A great sauna session does not need a soundtrack, but the right one can make a home wellness space feel more personal. This sauna speaker installation guide explains how to add audio without creating the two problems premium sauna owners should avoid: unsafe electrical work and equipment that cannot tolerate real heat and moisture.
The first decision is not where to cut a speaker opening. It is whether your sauna is actually suited to built-in audio. A traditional sauna can expose components to intense heat, changing humidity, and repeated thermal cycles. An infrared sauna is generally gentler, but its panels, wiring, and control system still make placement a careful job. Quality equipment deserves the same quality-minded planning that went into choosing the sauna itself.
Start With the Sauna Type and Listening Goal
Decide what you want the system to do before choosing components. If you want soft background music during solo sessions, a compact Bluetooth speaker placed outside the hot room may be enough. If you want clear, permanent sound for guided breathwork, recovery routines, or entertaining in an outdoor sauna area, a properly designed wired system is usually the better long-term answer.
Traditional electric and wood-burning saunas are the most demanding environments. Temperatures near the ceiling can exceed the safe operating range of ordinary consumer speakers, and steam or splash exposure adds another failure point. In these rooms, the safest approach is often to place speakers low on a wall, use components specifically rated for sauna or high-temperature use, and keep the amplifier and power source outside the hot room.
Infrared saunas often include integrated audio, Bluetooth, or speakers from the manufacturer. Before modifying one, check its documentation and warranty terms. Drilling into an infrared cabin can damage a heating panel, sensor lead, control wire, or foil barrier. If factory audio is not included, an external solution may preserve both the cabin and its warranty.
Choose Components Built for the Environment
Do not install standard in-wall home theater speakers simply because they fit the opening. Even moisture-resistant bathroom speakers are not automatically suitable for sauna heat. Look for speakers expressly identified for sauna use or, at minimum, for high heat and humid installations. Their drivers, adhesives, grilles, wiring terminals, and mounting materials should be designed to withstand repeated exposure rather than a single hot afternoon.
A reliable system usually has four parts: heat-tolerant speakers, speaker wire rated for the installation environment, an amplifier or receiver outside the sauna, and a music source such as a phone or dedicated Bluetooth receiver. The amplifier should live in a dry, ventilated location – often a nearby utility space, cabinet, or exterior weather-protected enclosure. It should never be mounted inside the sauna room.
Bluetooth is convenient, but it has trade-offs. A metal exterior, insulated walls, foil vapor barriers, and distance can weaken the signal. If your phone will stay outside the sauna, test Bluetooth reception from the planned seating position before finalizing the installation. A wired source connection or a better-positioned external receiver may be more dependable in a large backyard sauna or a cabin with thick walls.
For outdoor installations, separate weather resistance from heat resistance. A speaker can be excellent around a pool and still be a poor choice inside a hot sauna. Use sauna-rated equipment in the hot room and weather-rated equipment for the porch, changing area, or outdoor lounge.
Plan Speaker Placement Before You Drill
Speaker placement affects durability as much as sound quality. Heat rises, so avoid the highest section of the wall and never place speakers directly over the heater. Keep clear of the heater safety zone, water splash paths, vents, temperature sensors, and control components. In a traditional sauna, low-to-mid wall placement is often preferred because it exposes the speaker to less extreme heat while directing sound toward the benches.
Aim for balanced, relaxed audio rather than concert-level volume. Two speakers placed on opposite walls or evenly along one wall can create a fuller sound in a medium or large sauna. In a compact two-person unit, one properly placed speaker may be all you need. More hardware means more penetrations through the sauna wall, more wiring, and more chances to compromise the interior finish.
Take time to identify the wall assembly. Premium saunas may have interior cedar or other softwood paneling, insulation, a vapor barrier, framing, and exterior cladding. A misplaced cut can be difficult to repair cleanly. On infrared models, locate every panel and wire path before considering any modification. If you cannot confirm what is behind the wood, do not drill.
Sauna Speaker Installation Guide: Safe Wiring Matters Most
Electrical safety is not an accessory. It is the foundation of the project. The sauna heater circuit, controls, and lighting may have specific voltage, breaker, and wiring requirements. Your audio system should not be improvised into those circuits. Keep low-voltage speaker wire separate from line-voltage wiring and follow local electrical code requirements.
For a permanent installation, have a qualified electrician handle any line-voltage connection, new receptacle, wall penetration near electrical components, or work involving an outdoor structure. This is especially important when the sauna sits near a cold plunge, hot tub, shower, or other water source. Ground-fault protection and properly rated exterior equipment may be required depending on the installation.
Speaker wire should be routed where it is protected from physical damage and excessive heat. Avoid pinching it behind benches or running it across areas that will be frequently wet. If the wire must pass through a wall, use an appropriate sleeve or grommet to prevent abrasion. Seal openings carefully without trapping moisture or damaging the sauna’s intended ventilation and vapor management.
Do not rely on generic caulk as a cure for an incorrect hole or unsuitable component. The best installation starts with a clean plan that minimizes penetrations. In some cases, surface-mounted speakers outside the hot room are the smarter choice, even if recessed speakers look more custom.
A Practical Installation Sequence
Once you have confirmed compatibility, placement, and wiring routes, the physical work should proceed methodically. Start by shutting off power to any affected circuits and protecting the benches and heater from sawdust. Mark the location using the speaker manufacturer’s cutout template, then verify it one more time against framing, wires, and heater clearances.
Cut slowly and cleanly. Sauna interior woods are part of the visual experience, so a rough opening or splintered edge stands out. Route wire through its planned protected path, connect it according to the speaker polarity markings, and secure the speaker without overtightening fasteners into soft wood. Connect the other end to the external amplifier only after the speaker installation is complete.
Test the system at low volume before putting the sauna back into regular use. Listen for distortion, vibration, rattling grilles, or a weak Bluetooth connection. Then run the sauna through a normal heat cycle and check the exterior amplifier area, wire entry points, and speaker mounting after it cools. If a component smells hot, loses sound, or shows moisture intrusion, stop using it and correct the issue rather than hoping it settles in.
Protect the Sauna Experience, Not Just the Electronics
The best audio system disappears into the session. Set a sensible maximum volume so conversation, breathing, and the heater’s natural sound are not overwhelmed. If you use guided meditation or recovery content, choose a system with easy external controls so you are not reaching near hot surfaces or handling a phone with wet hands.
Maintenance is simple but worthwhile. Wipe grilles with a dry or barely damp cloth after the room has cooled, inspect mounting screws occasionally, and keep the amplifier area free of dust and blocked ventilation. Never spray cleaners or water directly into speaker grilles. If the sauna is seasonal or located at a vacation property, inspect the system before the first heat-up of the season.
At Select Saunas, our Zero Junk approach applies to the whole ownership experience, not just the sauna itself. A hand-picked sauna, heater, and accessory plan should work together for years, and we are here to help you think through compatibility before a small add-on becomes an expensive modification.
Treat audio as a finishing detail that should respect the sauna’s heat, woodwork, electrical design, and warranty. When the installation is planned with those priorities first, your favorite playlist can be there when you want it – and quietly out of the way when you do not.
Leave a Reply